11 Essential Plastic Welding Tips for Beginners

Plastic welding is a crucial technique across industries, with a growing global market. The automotive sector, for instance, relies heavily on plastic welding for manufacturing and repairing parts like car bumpers. This article provides comprehensive guidance on 11 plastic welding tips, basic principles and how to weld plastic.

Table of Contents
Understanding Plastic Types for Welding
11 Successful Plastic Welding Tips
Safety Precautions in Plastic Welding
Start Plastic Welding with a Step-by-Step Guide
Troubleshooting Common Plastic Welding Issues
Frequently Asked Questions About Plastic Welding
Conclusion
Understanding Plastic Types for Welding
Before learning the plastic welding tips, it's essential to understand the common types of polymers used in plastic welding. Here are four key plastics and their properties to help you choose the right plastic materials for your plastic welding projects.
Polyethylene (PE)
Polyethylene is one of the most widely used polymers globally, found in everything from plastic bags and containers to pipes and tanks. Known for its durability, lightweight, and flexibility, it comes in two main types: low-density polyethylene (LDPE) and high-density polyethylene (HDPE).
The melt flow index (MFI) ranges from 0.3 to 100 g/10 min for LDPE and 0.1 to 50 g/10 min for HDPE, as shown in Table below.
Polymer Type |
Melt Flow Index (g/10 min) |
LDPE |
0.3 - 100 |
HDPE |
0.1 - 50 |
Polypropylene (PP)
Polypropylene is a versatile plastic used in applications from packaging to automotive plastic parts. It offers an excellent balance of rigidity and flexibility while resisting chemicals, moisture, and heat. PP's MFI typically ranges from 0.5 to 100 g/10 min.
Acrylonitrile Butadiene Styrene (ABS)
ABS is a tough, rigid plastic commonly used in automotive parts, pipes, and consumer goods. Its combination of strength, flexibility, and impact resistance makes it ideal for many applications.
High-Density Polyethylene (HDPE)
HDPE is a stronger, more rigid variant of polyethylene used in plastic bottles, pipes, and water tanks. It offers excellent durability, impact resistance, and temperature tolerance. According to ASTM D2657 standard, HDPE typically welds at temperatures between 260 - 290°C (500 - 554°F).
Understanding these plastic types helps welders select appropriate plastic welding techniques and equipment for your projects.
11 Successful Plastic Welding Tips
A successful plastic welding depends on several key factors. Here are 11 essential plastic welding tips to help you achieve strong, durable joints in your projects.
1. Choose the Right Welding Method
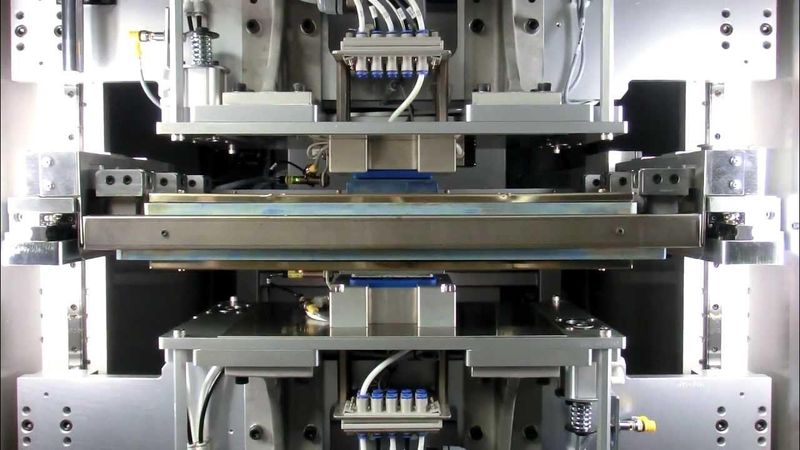
Different polymers require different plastic welding methods. HDPE welding works well with hot plate or extrusion welding, while ultrasonic welding suits smaller parts.
Ultrasonic welding uses high-frequency vibrations (20 - 40 kHz) to generate heat through friction at the joint interface. Choose your method based on the material and project scale.
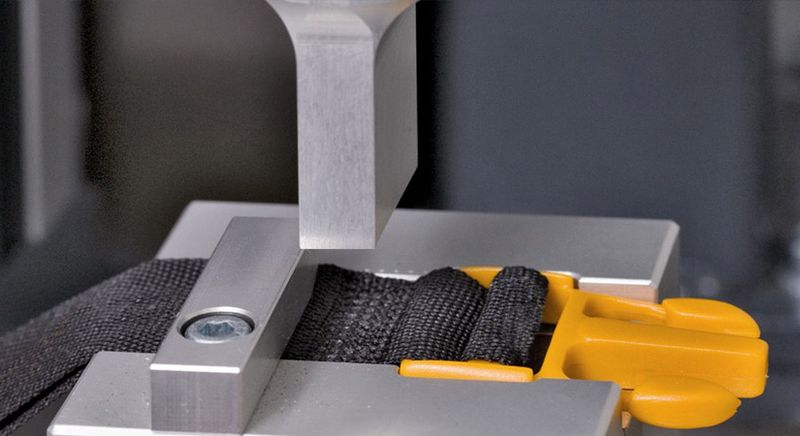
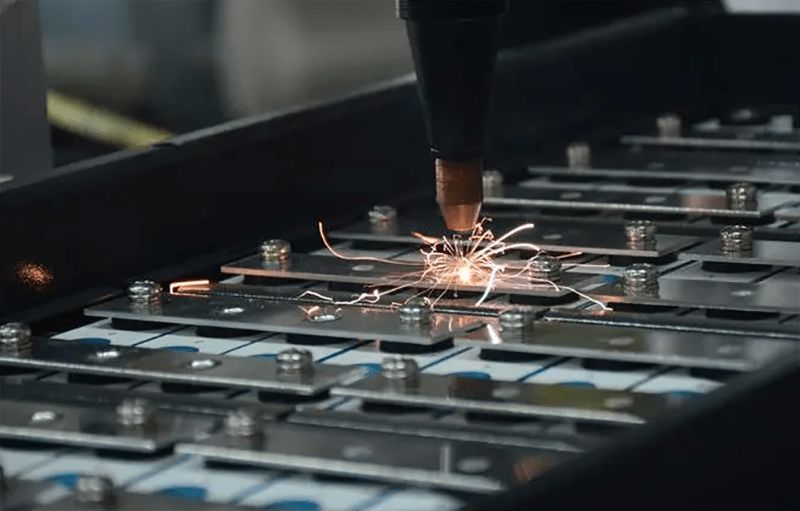
2. Use the Right Plastic Welder
Your choice of welder significantly affects results. Hot air, extrusion, and laser welders each serve specific plastics like PP or PE. Laser welders, for instance, excel in medical device manufacturing, creating precise, hermetic seals without adhesives.
3. Identify the Type of Plastic Being Welded
Each plastic responds differently to heat and pressure. Identify your material (PE, PP, ABS) to set the correct welding parameters.
4. Know the Correct Temperature for the Plastics You're Welding
Each plastic type needs specific temperature ranges for optimal results. HDPE welding follows the ASTM D2657 standard at 260 - 290°C (500 - 554°F). PE welding temperatures vary by type but generally fall within this range.
5. Ensure Clean Surfaces
Clean surfaces are crucial for strong bonds. Oil, dirt, or dust can weaken welds, especially in HDPE or PP welding. Use an appropriate plastic cleaner for thorough surface preparation.
6. Use Correct Welding Parameters
Adjust speed, pressure, and welding time for each method and material. Follow manufacturer guidelines and modify settings based on part size. For thicker materials in extrusion welding, reduce welding speed to ensure proper fusion.
7. Match the Plastic Types
Use compatible plastics for welding. Materials with different melting points create weak joints - for example, welding HDPE with other plastic types typically fails.
8. Monitor Heat Distribution
Even heat distribution creates strong, consistent welds. Apply heat uniformly across the welding area and maintain proper equipment calibration to prevent temperature irregularities.
9. Use Proper Jigs and Fixtures
Jigs and fixtures secure parts during welding, ensuring proper alignment and preventing shifts that could compromise weld quality. Complex projects may require custom fixtures.
10. Test Welds Before Full Production
Test small samples first to verify strength, material behavior, and parameter settings. Early testing saves time and resources by identifying potential issues before full-scale production.
11. Maintain Welding Equipment
Regular maintenance ensures consistent performance. Keep tools clean, replace worn parts, and calibrate machines to produce reliable, high-quality welds.
Safety Precautions in Plastic Welding
Safety is paramount when working with plastic welding equipment. Here are the essential safety protocols every welder must follow.
1. Wear Appropriate Personal Protective Equipment (PPE)
The right PPE is your first line of defense. This includes safety goggles or a face shield, heat-resistant gloves, protective clothing, and respiratory protection.
2. Ventilate the Workspace
Plastic welding releases potentially harmful fumes, especially when working with PVC, polystyrene, or ABS. Ensure proper ventilation to maintain air quality and prevent exposure to toxic gases.
3. Ensure Proper Equipment Grounding
Ground all plastic welding tools with electrical components to prevent shocks. Check your welding machine's grounding before use and inspect wiring and plugs for damage.
4. Avoid Working in Confined Spaces
High-temperature welding creates hazardous conditions in poorly ventilated areas. Avoid tight or enclosed spaces where heat and fumes can accumulate.
5. Use Welding Equipment Properly
Each welding machine is designed for specific tasks. Use equipment according to manufacturer guidelines to prevent accidents and ensure successful welds.
6. Keep Fire Extinguishers Nearby
High-temperature welding poses fire risks. Keep a fire extinguisher rated for electrical fires and flammable materials within easy reach.
7. Handle Hot Materials Carefully
Welded plastic remains hot for some time after processing. Let parts cool naturally before handling to avoid burns.
8. Be Aware of Chemical Exposure
Heated plastics can release harmful chemicals. Review material safety data sheets (MSDS) for your materials and understand the risks of inhalation and skin exposure.
9. Maintain a Clean Work Area
A clean workspace prevents accidents. Keep your area free of debris, clutter, and flammable materials that could cause fires or impede movement.
10. Train Workers on Safety Procedures
Safety isn't optional. Thorough training is essential for everyone involved in plastic welding.
Start Plastic Welding with a Step-by-Step Guide
How to weld plastic? Starting a plastic welding project can seem daunting, but following these manageable steps to melt plastic together will ensure success.
Step 1: Prepare the Workspace
Ensure your workspace is clean, well-lit, and well-ventilated. The surface should be flat and stable. Gather all necessary tools and equipment beforehand.
Step 2: Select the Right Plastic Materials
Different plastics require different plastic welding methods. Choose materials suitable for plastic welding. If uncertain, consult a welding machine manufacturer like Dizo or experts.
Step 3: Clean the Plastic Surface
Remove all contaminants - dirt, grease, or oil - from the welding surfaces. Use a solvent-based cleaner, mild detergent, or plastic cleaner to ensure a clean surface for strong bonding.
Step 4: Choose the Welding Method
Select the best welding method to melt plastic together based on your plastic and project. Ultrasonic welding works well for smaller parts, while hot plate or vibration welding suits larger pieces like PP welding. Consult welding method guides as needed.
Step 5: Set the Correct Temperature
Each plastic has its optimal welding temperature range. Set your equipment accordingly and monitor temperature with a gauge throughout the process.
Step 6: Align and Clamp the Parts
Proper alignment prevents weak welds. Use appropriate clamps or fixtures to hold parts firmly, ensuring they stay aligned with even pressure during welding.
Step 7: Commence the Fusion Procedure
Begin welding using your chosen method. For hot plate welding, place parts on the heated plate, melt slightly, then press together with appropriate force. For ultrasonic welding, ensure even vibration. Monitor temperature and pressure throughout.
Step 8: Cool and Inspect the Weld
Allow the polymer to cool naturally after welding. Quick cooling weakens the weld, so give sufficient time for solidification and proper bonding. Inspect for imperfections like cracks, gaps, or weak spots.
Step 9: Test the Weld Strength
Test the weld's strength using a tensile testing machine or manual pressure. If it fails, adjust welding parameters such as temperature or pressure.
Step 10: Trim and Finish the Welded Area
After confirming weld strength, trim excess material and smooth rough edges using a grinder or file for a professional finish.
Troubleshooting Common Plastic Welding Issues
Even with careful preparation, issues can arise during plastic welding. Here are the most common plastic welding problems and their solutions.
Weak Welds
Problem
Weak joints occur when welds fail to maintain strength under stress.
Possible Causes
- Incorrect temperature or pressure settings
- Poorly aligned parts
- Contaminated surfaces
How to Fix It
- Set the temperature to match your plastic-type and use temperature controls or a thermometer to monitor heat
- Secure parts with clamps or fixtures to maintain proper alignment throughout welding
- Clean surfaces thoroughly - even tiny amounts of dirt, grease, or oil can prevent proper bonding
Burnt or Discolored Plastic
Problem
Overheating can cause burning or discoloration, damaging the plastic and compromising weld quality.
Possible Causes
- Excessive welding temperature
- Too much pressure or extended weld times
- Wrong welding method for the plastic type
How to Fix It
- Follow recommended temperature settings and stay within your material's heat tolerance
- Watch for overheating signs and reduce welding time - plastic can burn quickly
- Use a welding method appropriate for your plastic type
Air Bubbles in the Weld
Problem
Trapped air bubbles weaken joints and create defects in the final product.
Possible Causes
- Insufficient pressure during welding
- Rushing the welding process
- Excessive airflow in hot air welding
How to Fix It
- Maintain proper pressure throughout welding to prevent air gaps
- Take time to let the plastic melt and fuse properly
- When using hot gas or air welding, adjust airflow to prevent bubble formation
Tool Marks on Welded Plastic
Problem
Tool marks like grooves or dents can appear on welded plastic surfaces. These marks not only look unsightly but can also weaken the weld.
Possible Causes
- Too much pressure or poorly positioned clamps
- Incorrect tool selection or settings
- Overly aggressive welding technique
How to Fix It
- Use the right welding tool for your project and verify it's in good condition
- Apply gentle pressure and position clamps correctly to hold parts securely
- Maintain steady, controlled heat and pressure throughout the welding
Weld Failure After Cooling
Problem
A weld may look strong initially but fail once cooled - particularly problematic when the joint needs to handle stress.
Possible Causes
- Incorrect cooling rate
- Insufficient bonding time
- Incompatible plastics
How to Fix It
- Let the plastic cool naturally - rapid cooling causes uneven contraction and cracks
- Apply adequate heat and pressure during welding to ensure proper bonding
- Verify plastic compatibility before welding - some materials won't bond properly regardless of technique
Inconsistent Weld Appearance
Problem
Variations along the weld seam often indicate improper technique or faulty equipment.
Possible Causes
- Uneven heat distribution
- Inconsistent pressure
- Faulty welding equipment
How to Fix It
- Monitor heat distribution with a heat gun or infrared thermometer
- Maintain even pressure along the entire weld by adjusting clamps properly
- Inspect welding tools for damaged parts like faulty nozzles or heating elements
Poor Part Fit
Problem
Parts may not align properly even with correct weld settings, creating gaps or misalignment.
Possible Causes
- Poor part preparation
- Material warping during welding
- Loose parts during welding
How to Fix It
- Ensure parts are cut precisely and fit together before welding
- Check and adjust alignment throughout the welding process
- Apply heat evenly to prevent warping
Excessive Smoke or Fumes
Problem
While some smoke is normal during plastic welding, excessive fumes indicate a problem.
Possible Causes
- Wrong temperature settings
- Overheated materials or tools
- Unsuitable or toxic plastics
How to Fix It
- Set the temperature within the recommended range for your material
- Stop welding and allow cooling if excessive smoke appears
- Use only high-quality, welding-grade plastics and check material safety data sheets
Frequently Asked Questions About Plastic Welding
1. What Types of Plastics Can Be Welded?
Many thermoplastic materials can be welded, though not all plastics are suitable. The most commonly welded plastics include Polyethylene (PE), Polypropylene (PP), Acrylonitrile Butadiene Styrene (ABS), High-Density Polyethylene (HDPE), and PVC (Polyvinyl Chloride).
2. What Tools Do I Need for Plastic Welding?
Required tools vary by welding type and material. Basic equipment includes a plastic welder, welding rods, clamps, fixtures, a thermometer, cleaning supplies, and a ventilation system.
3. How Do I Ensure a Strong Weld in Plastic Welding?
Strong welds depend on proper temperature, correct pressure, clean surfaces, compatible materials, and thorough testing. Attention to these factors ensures durable joints that can handle stress.
4. What Are the Advantages of Plastic Welding?
Plastic welding excels in industrial, automotive, and consumer applications. Its benefits include cost-effectiveness, environmental friendliness, strong joints, versatility, and attractive finished appearance.
5. What Are the Limitations of Plastic Welding?
Despite its advantages, plastic welding has limitations. It works only with thermoplastics, not thermosetting plastics. It requires specialized thermoplastic welding equipment, requires skilled operators, and may not suit very thin materials that can easily distort during welding.
Conclusion
Plastic welding stands as a vital technique in modern manufacturing and repair, offering robust thermoplastic welding solutions for joining thermoplastic materials. As technology advances, new challenges emerge - particularly with biodegradable plastics, where precise temperature control and joint strength remain key technical hurdles.
If you're looking for professional plastic welding services or need help with your next project, dizo-global.com is always here to assist! Our team of experts is ready to provide you with the best solutions tailored to your specific needs.
Pro Tip: Use a pyrometer for real-time temperature monitoring during welding. This helps achieve more accurate, consistent results - especially with plastics that have narrow optimal temperature ranges.